See the protocol here: https://www.protocols.io/view/growing-bacteria-in-superbroth-thick-food-3qmgmu6
See the protocol here: https://www.protocols.io/view/growing-bacteria-in-superbroth-thick-food-3qmgmu6


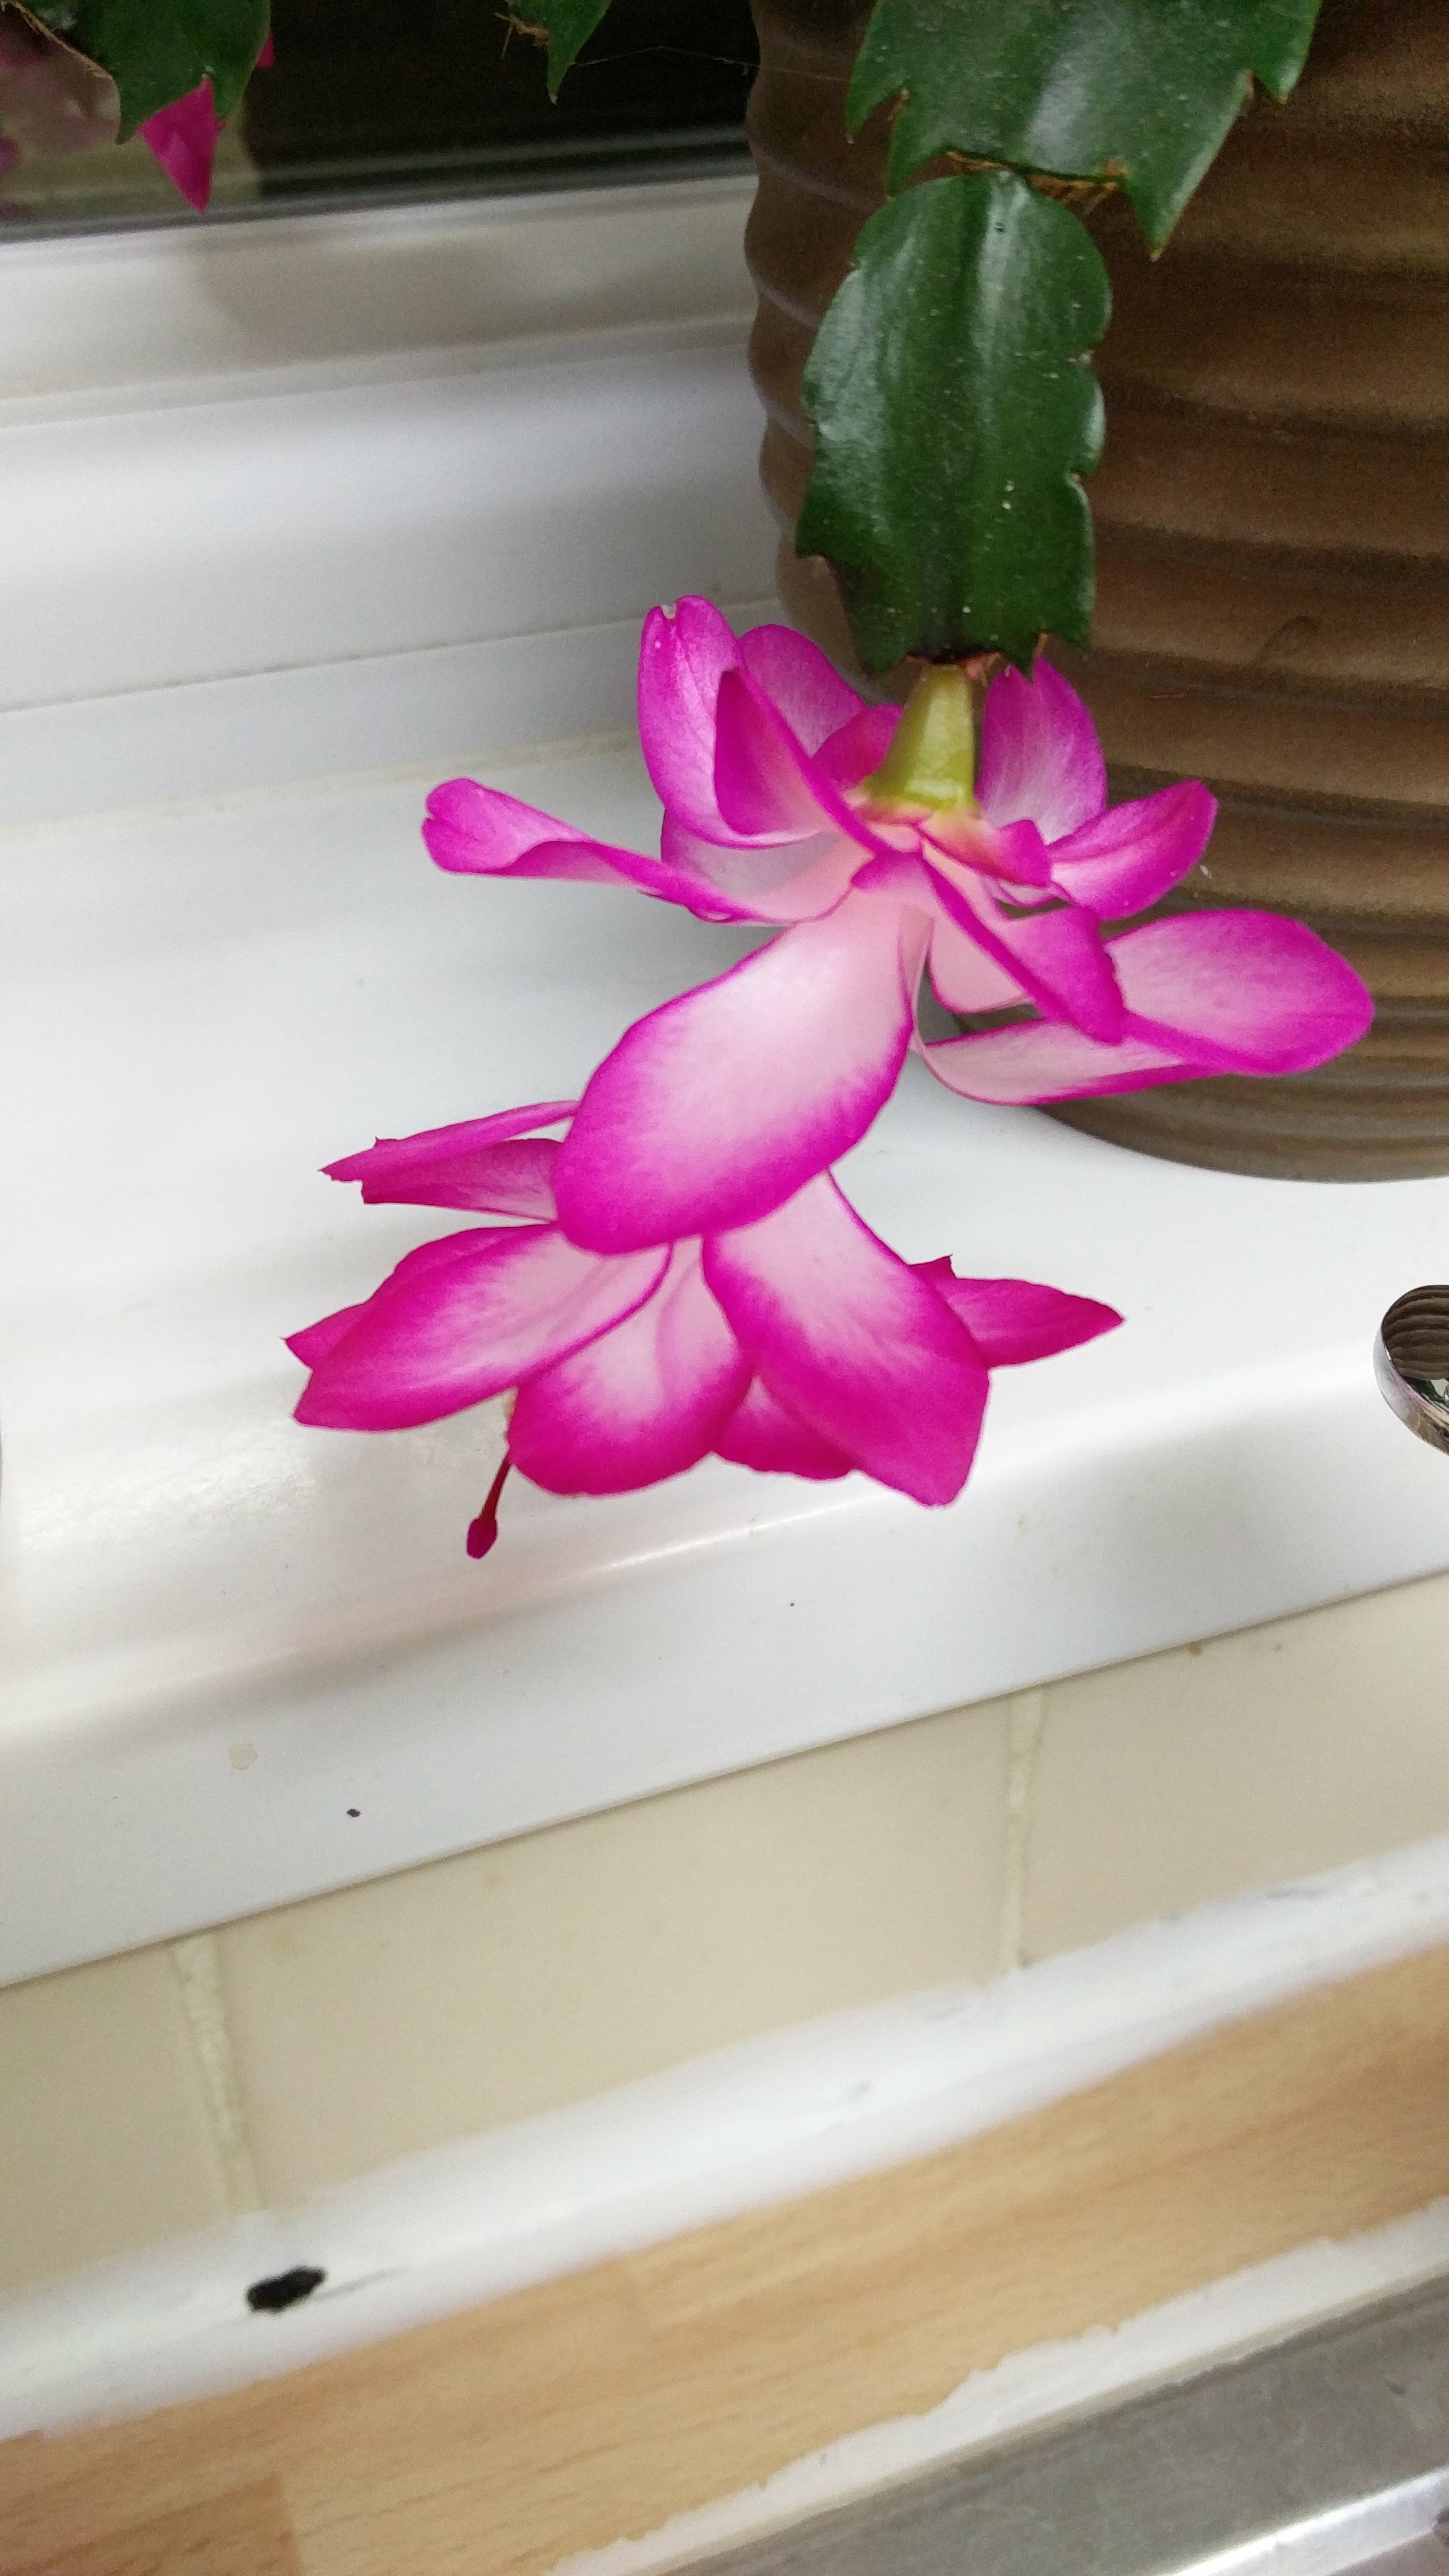
Un cactus du genre Schlumbergera, d’après la vidéo ici (http://blog.gardenloversclub.com/houseplants/growing-holiday-cactus/) la variété de Thanksgiving dû aux bords des cladodes piquants et à la fleur zygomorphe (symétrie bilatérale).
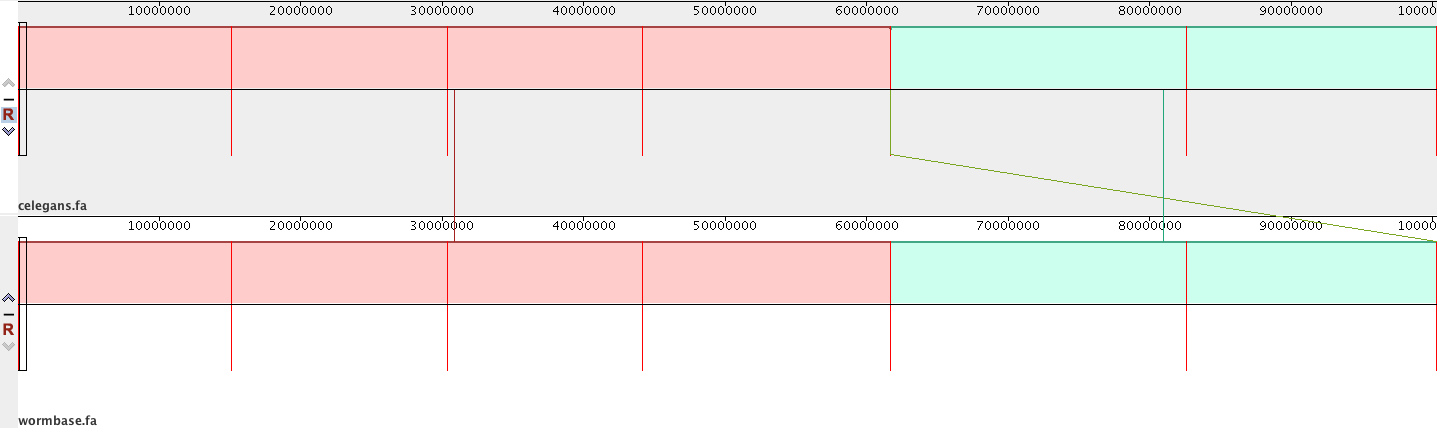

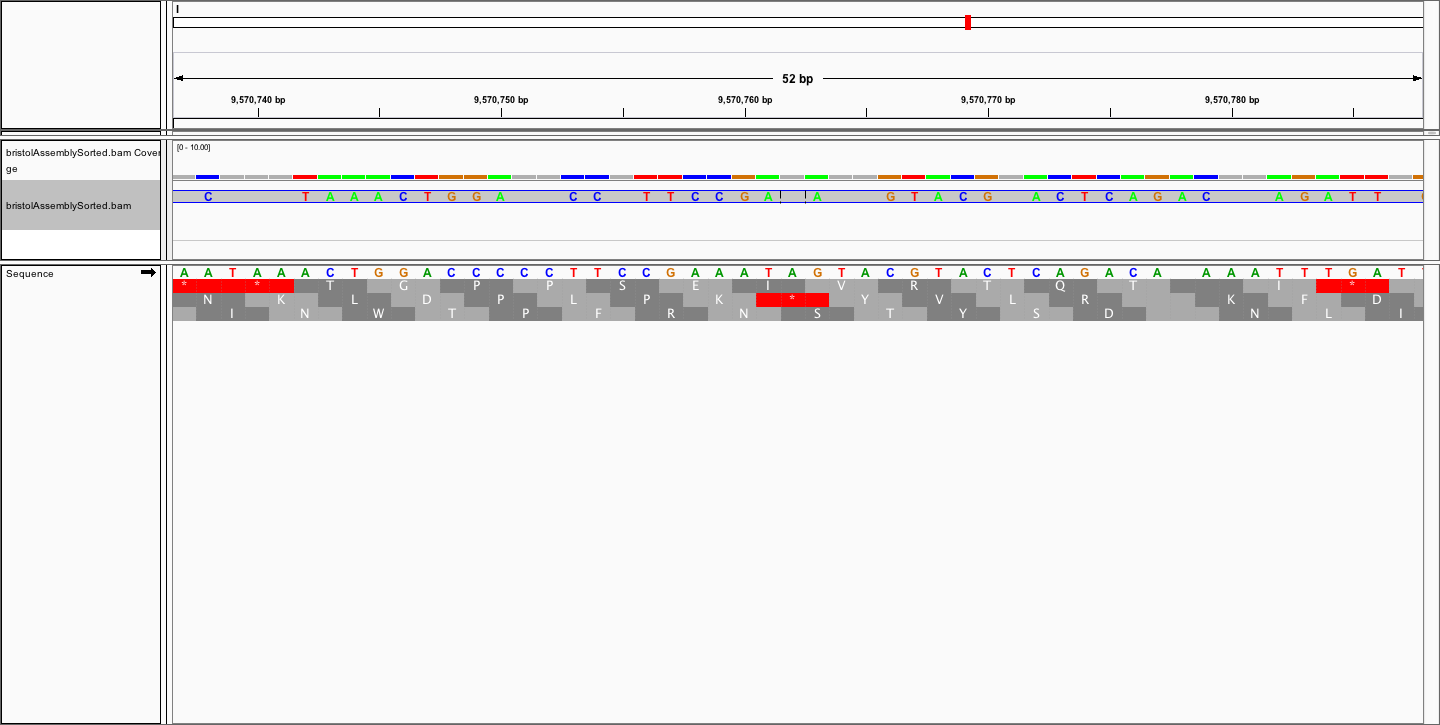
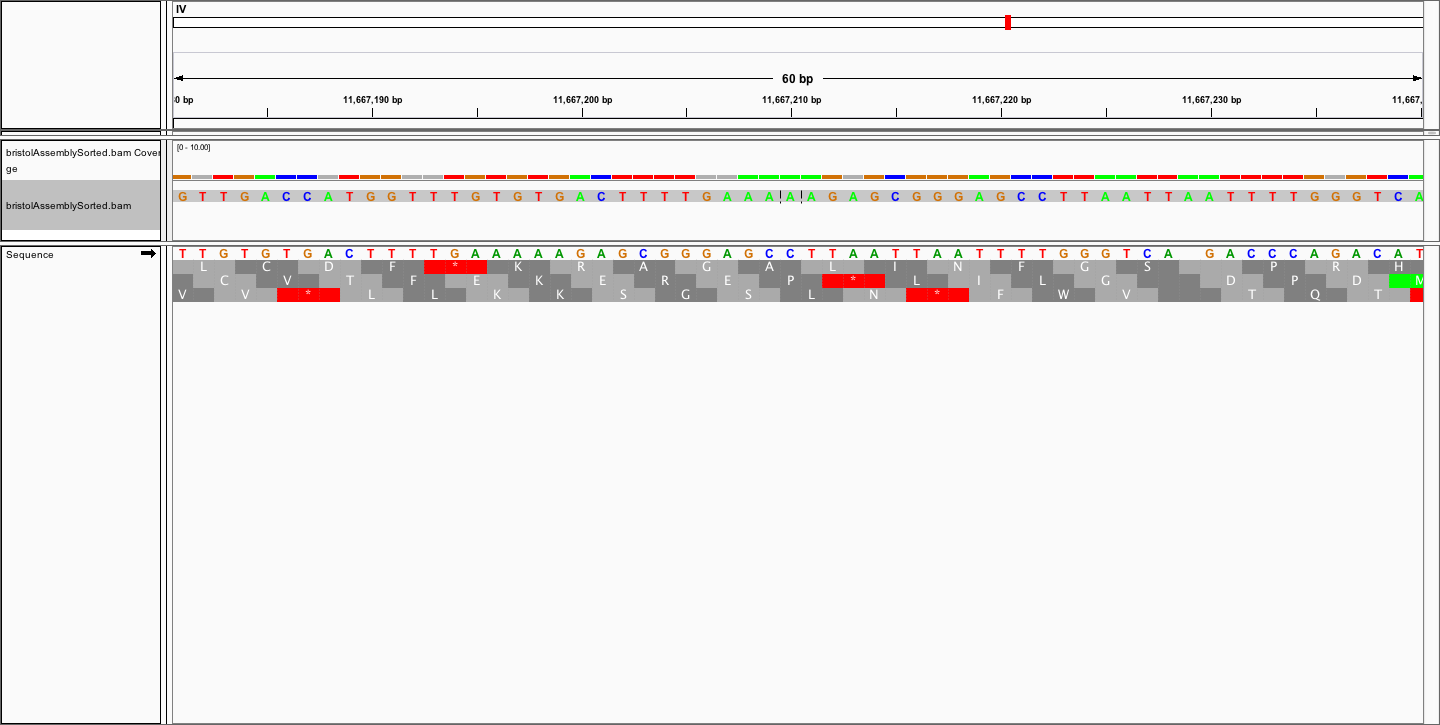

Dear all,
I have indexed the C. elegans reference genome with:
bwa index output/genome/ref/seq/celegans.fa
and then aligned my de novo assembly to the reference with:
bwa mem -t 8 -x intractg output/genome/ref/seq/celegans.fa input/assembly/celegans/hgap/bristol/assembly.fa > output/alignment/pacbio/bwa/ref/bristolAssembly.sam
I then
samtools view -bS output/alignment/pacbio/bwa/ref/bristolAssembly.sam > output/alignment/pacbio/bwa/ref/bristolAssembly.bam
samtools sort output/alignment/pacbio/bwa/ref/bristolAssembly.bam -o output/alignment/pacbio/bwa/ref/bristolAssemblySorted.bam
samtools index output/alignment/pacbio/bwa/ref/bristolAssemblySorted.bam
to visualise the alignment in IGV.
<!doctype html>
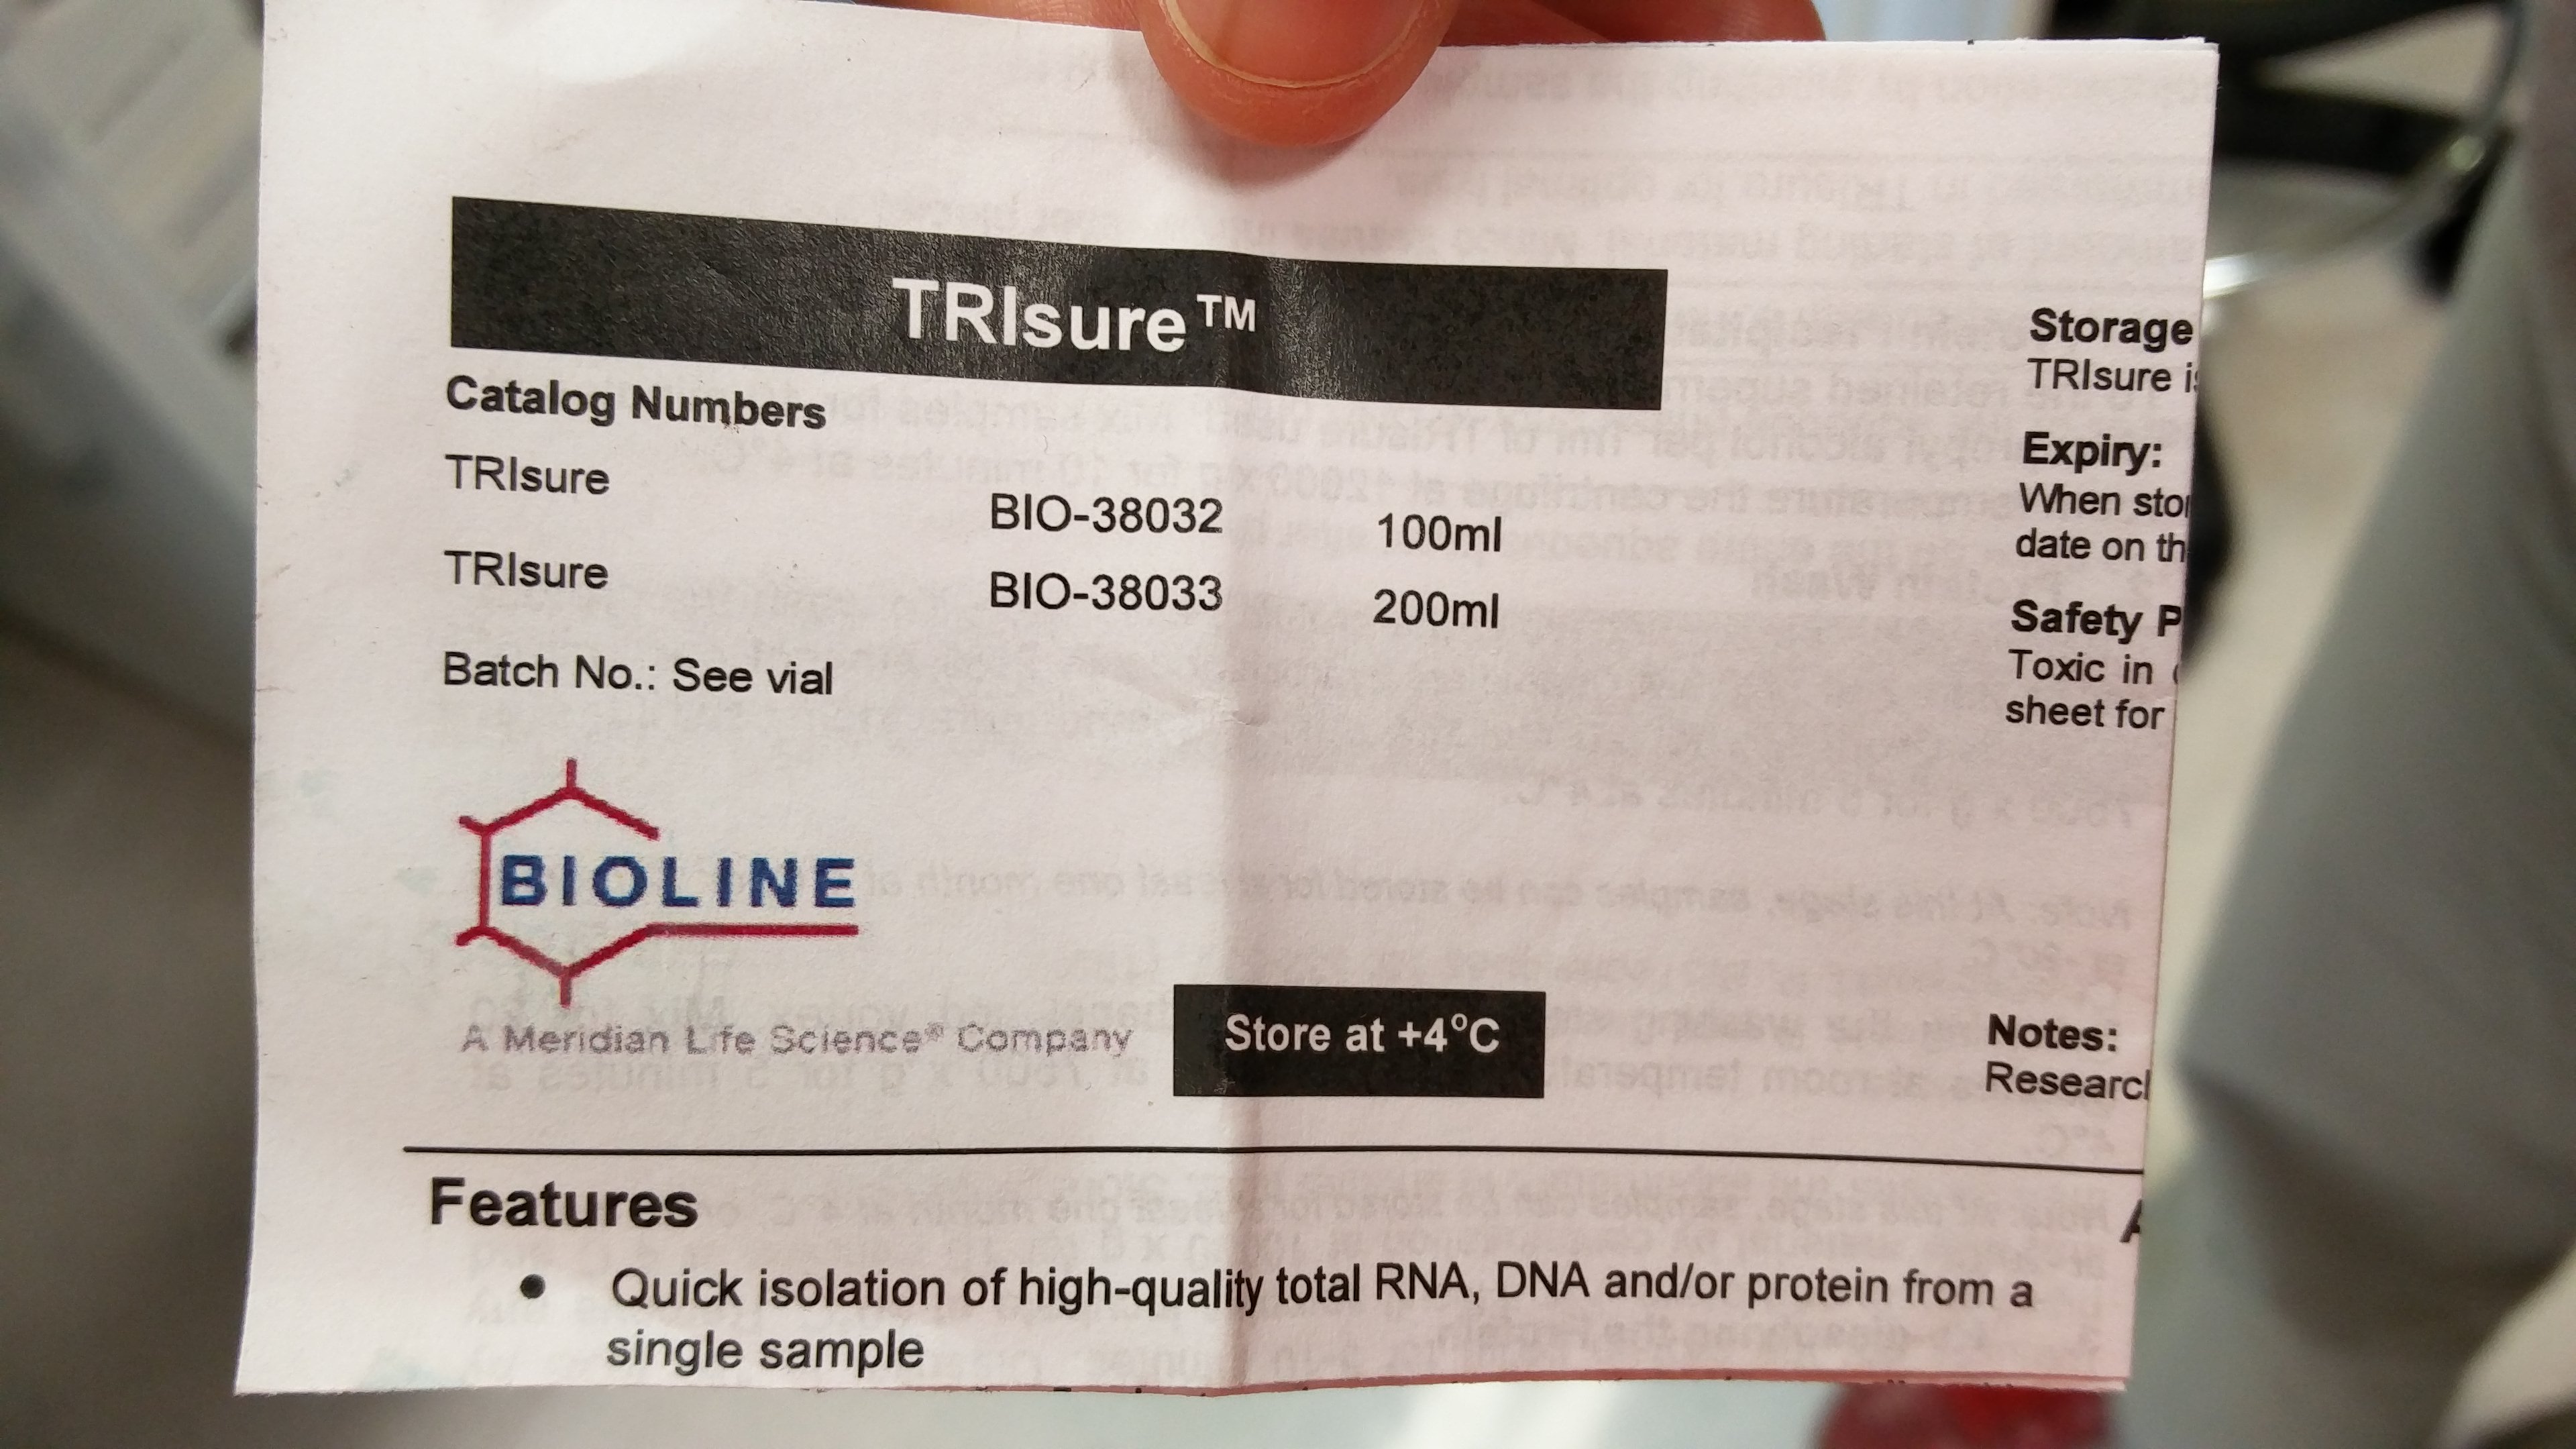
DNA Purification
Defrost the stock into an agar plate.
The strains I am working with should be isogenic but to increase the probability of working with an isogenic strain, I created
a new strain originating from a single worm. Pick a single worm into a new fresh agar NGM plate. Let it move away from the point
of deposition. Pick it again into a new fresh plate. This procedure of first picking into a plate and then into another makes sure
that no other worms or eggs are co-picked with the single worm of interest. Let the single worm populate the whole plate and
chunk the plate into 2 or more plates. This strain is now called differently, starting with SX, the code given to the Miska lab.
Freeze of of the plates.
Always freeze 5 vials. White plug in one of the 5 red caps. New strain from single worm is called
SX…. . SX is the Miska lab designation in the world. One of the tubes will be thawed tomorrow to check
that the freezing worked. One tube will be put in liquid nitrogen for long term storage. Three tubes will be
put in the -80 C freezer for mid term storage. Take a 15 ml Falcon tube, M9 medium, freezing buffer 2X.
Final volume of vial: 1 ml, so need 2.5 ml of freezing buffer. Pour 3.2 ml M9 on plate. Take 2.5 ml back with
pipetboy and 5 ml serological pipette. Put in Falcon. Add 2.5 ml freezing buffer to falcon. Pipet 1 ml of
solution in each vial. Transfer the vials into a polystyrene box. Tape the polystyrene box shut. Put the polystyrene box
in the -80 C freezer. The box allows the temperature decrease to be slower. Tomorrow, put test tube in tap water for 5 min.
Pour on plate and check that worms are alive. Put other tubes in inbox (4 tubes) and email lab manager. New strain SX…. is ready.
Pick a few worms into a fresh agar plate.
Once many gravid adults are present on the plate, bleach them and grow the eggs overnight at -20 C on a rotating wheel.
Prepare 50 ml of bleach solution in a 50 ml Falcon tube: 4mL 10M NaOH, 3mL Sodium hypochlorite (stored in the cold room), 43mL H2O. The bleach solution can be stored at room temperature for one month.
Tip: Pipette gently to avoid collecting bits of agar together with the worms.
Measure the nucleic acid concentration using Nanodrop.
Lift pedestal.
Clean sample area.
Drop pedestal.
Touch screen.
-> Nucleic Acids -> dsDNA
Instrument self-test…
Lift pedestal.
Clean pedestal.
Load blank.
Lower arm.
Export Nanodrop results onto USB stick.
Measure the dsDNA concentration using Qubit.
Use low sensitivity dye (BR: broad range) dilute 200x reagent in buffer to give working solution prepare two
standards tubes in Qubit tubes
Agarose gel: 250 ml flask. Add 0.45 g agarose in 60 ml TAE in measuring cylinder.
Tape container. Put comb in container. Microwave 1 min. Add 0.6 ul ETBR to solution.
Stir. Pour in 4 C room. Add water in flask. Stir. Pour through white material for ETBR. Wash flask with water.
Remove tape. Put gel in container. Add 5 ul ladder. Add 2 ul loading buffer to 5 ul DNA sample and load into gel.
Turn on machine on right. 150 mV, 400 mA, 30 min. Check run every 10 minutes.
Put gel in Imager. Open Image Lab. New Protocol.
Position gel, zoom in/out. Start Protocol. Image is ready on computer.
Invert contrast, change contrast, print image. Don’t touch the computer without gloves. It is contaminated.
Thanks to Jérémie Le Pen and others from the Miska lab for the invaluable advice.
In recent years, the market of personalised genetic testing has emerged thanks to cheaper sequencing techniques. Some companies now offer genetic tests at an affordable price (£125 on www.23andme.com). All that is needed is a mouth swab that can be done at home. Send the box by post and receive the results within a few weeks. Find out about the probability of you developing diabetes, hypertension and dementia and take measures to prevent these diseases. Find out now whether you are one of those unfortunate people who will develop Huntington’s disease in their late years and plan your life accordingly. Why is this technique not used in any healthcare system yet? What are a hundred pounds compared to all the benefits promised by this test?
First of all, how reliable are the predictions made by the test? Given that we are dealing with increased risks, what is their magnitude and reliability? The genetic risks have been calculated in an initial population. Will they be the same in a new population? We should not remember that we are talking about predisposition and that in no case does one genetic variant always cause a disease. Secondly, once I know that I am at risk of diabetes, will I change my behaviour and lead a healthier lifestyle? Shouldn’t everyone eat healthily, exercise, avoid smoking and drink alcohol in moderate amounts? After all, healthy habits are beneficial for everybody. A recent study has shown that communicating genetic risks of disease does not reduce risky health behaviour (Hollands et al.). What is more, if a risk of incurable disease is communicated, like in the case of Huntington’s disease, imagine the unnecessary distress and sense of powerlessness that you might suffer. Thirdly, in case you are more sensitive to a drug but your healthcare system does not deal with it, what can you do with that information? Most healthcare systems in the world do not even take into account sex and weight when administering drugs, let alone genetic sequence. They do, however, adapt the treatment of breast cancer patients or leukaemia patients to their genome because the evidence of the genetic influence is very strong. Finally, do you really want to give your genetic code away? Isn’t your genetic code something special, that belongs only to you and should not be breached lightly? If you have no issue with disclosing your blueprint to anyone, what about sharing it with a health insurance company? Wouldn’t it be risky to leave your genomic sequence out there, prone to being stolen? One must admit that the probability of your data being disclosed to a health insurance company is higher than a health insurance company stealing a bit of you and sequencing you without your consent. In Switzerland and under certain conditions, health insurers can demand the results of a genetic test to be disclosed only if a test has already been carried out. In no case can a health insurance company demand from a patient to carry out a genetic test (Federal Law on Human Genetic Analysis, 2004). In case an insurance company discovers you are at a higher risk of certain diseases, they will want to charge you more for an insurance or will add reserves in the contract. It is in your interest to not deal with your genetic sequence lightly.
In conclusion, you need to ask yourself all these questions before going ahead and getting sequenced. If you deem the advantages to be higher than the downsides, then get yourself tested. I, personally, wouldn’t.
Cristian Riccio
Reference
The following code illustrates the concept of integration. The concept is to divide the x-axis in segments of equal width. We then take the value of y of the function on the right side of the segment and draw a rectangle of height y. The sum of the areas of the rectangles is greater than the area under the curve and approaches the area under the curve when the width tends to 0.
J’ai pris connaissance de cet engin en ligne qui semble assez pratique pour utiliser R en ligne, surtout si on veut faire quelque chose sur R rapidement lorqu’on utilise un ordi qui n’a pas R d’installé.